
Kodak Aerochrome cameras: Building My Own Medium-Format Cameras By David
Last year I met David when he joined one of my tours here in Japan. Somewhere in the middle of a casual conversation, he dropped a line that made me stop in my tracks: he builds his own cameras. Just like that… no fanfare, no big deal.
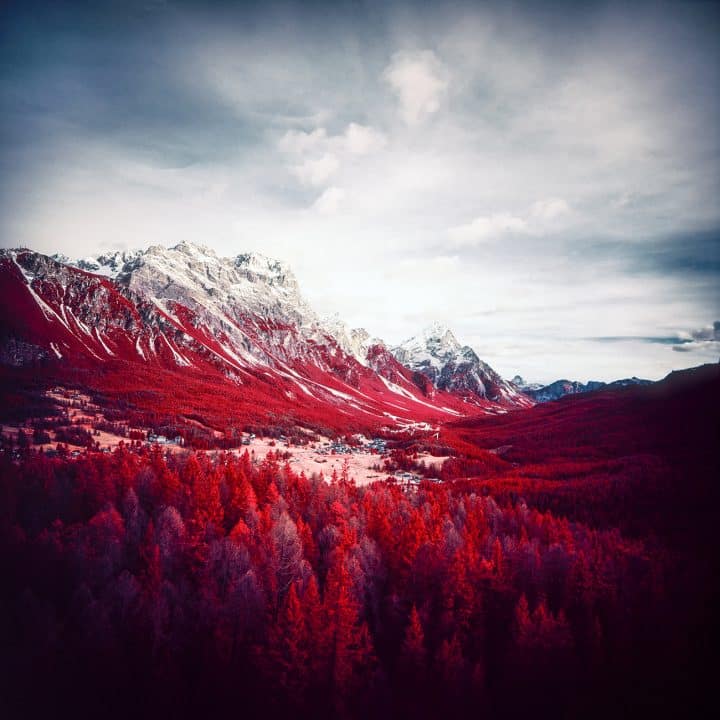
But these aren’t ordinary cameras. David shoots on Kodak Aerochrome, the legendary infrared film known for its vivid reds and dreamlike landscapes, which means he designs his cameras to go as wide as possible to get as much from the film as possible.
I had to know more. So I asked if he’d share his story with us, because the journey he’s taken, from tinkering with parts to building a camera he’s truly happy with, is every bit as fascinating as the images it creates. Read on
I’ve always been interested in infrared photography. For several years, I explored it using converted digital cameras, gradually building experience and a deeper understanding of the medium. Around 2019, I felt the urge to try Kodak Aerochrome. The problem sounded simple: I needed a medium-format camera.
I had started chasing the idea of a Hasselblad SWC. Somewhere along the way, that chase turned into something else entirely.
2018 — Baby Steps with Heavy Gear
My father gave me his Mamiya RB67, which he had previously used for laboratory work. That camera became my entry point into analog photography, and it didn’t take long before I was completely hooked. However, the RB67 is hardly what one would call portable—and a 50 mm lens on 6×7 wasn’t wide enough to meet my expectations.
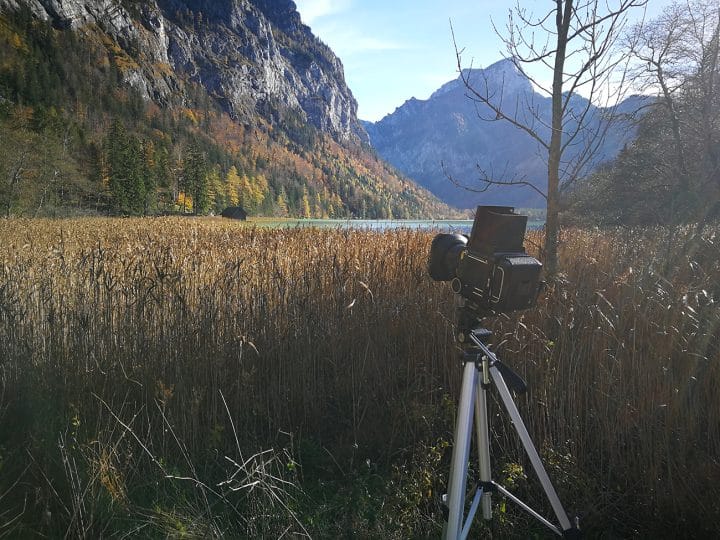
At the time, I was working in sales, so it was acceptable to keep the camera in the trunk of my car and transport it that way. Since I was just starting with Aerochrome and didn’t know any better, I didn’t only carry the RB67 around—I also kept a small portable fridge in the car to store the precious film at a stable temperature. I made many great photographs with the RB67, yet there were countless situations where I missed shots simply because the camera was too cumbersome to carry all day.
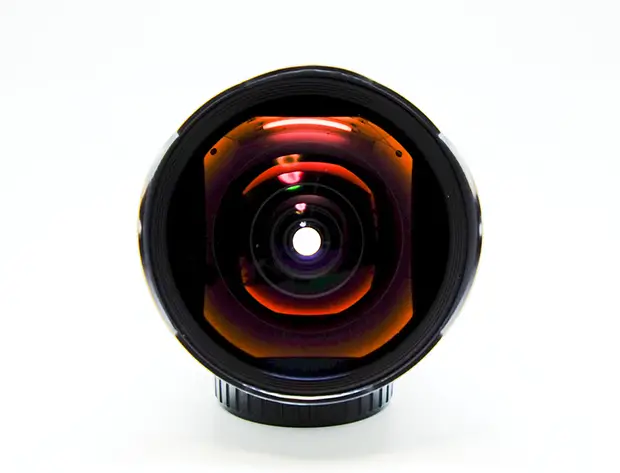
Around that time, the Aerochrome work of Mark Rowell, especially his images made with the Hasselblad SWC, became a major inspiration. I loved the focal length and the 6×6 format. It was clear to me: 38 mm was the goal. Since a Hasselblad SWC was far beyond my budget, I went for the closest thing the market had to offer—the Lomography LC-A 120, with its 38 mm f/4.5 lens and 6×6 format.
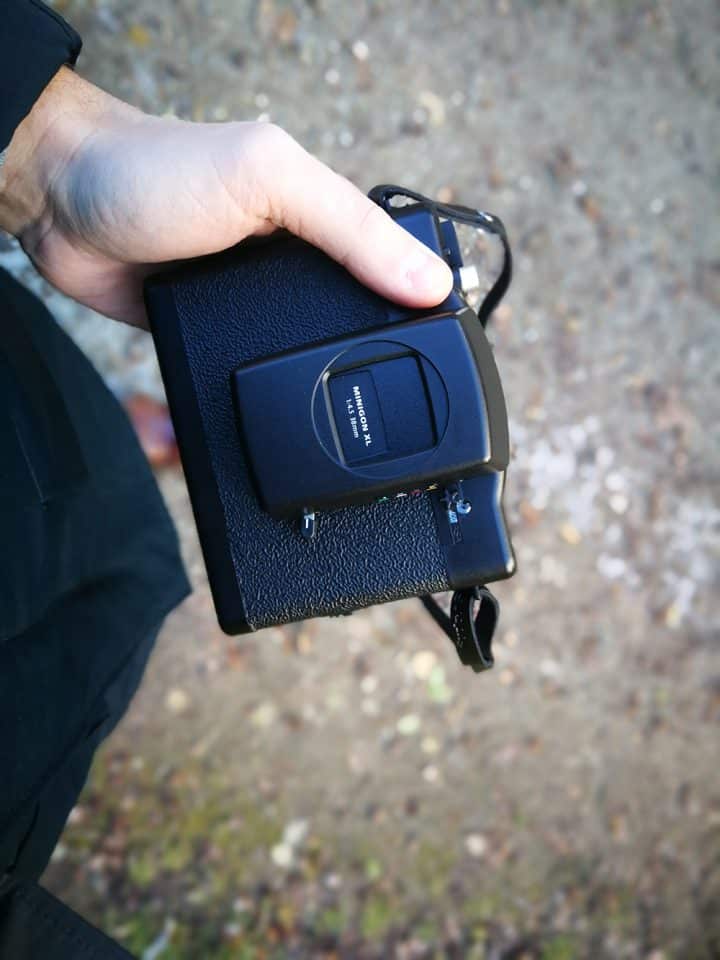
It’s a camera I still enjoy using and take on every trip. I carried it with me during my travels through Vietnam, and many of my favorite images from that time simply wouldn’t exist if I had been using a slower camera. Without the automatic exposure system, I would have missed many of those moments.
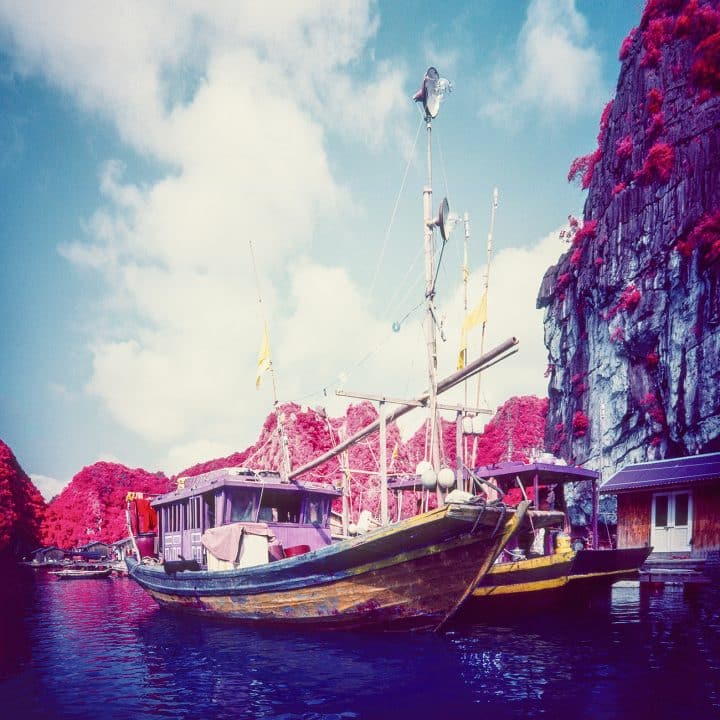
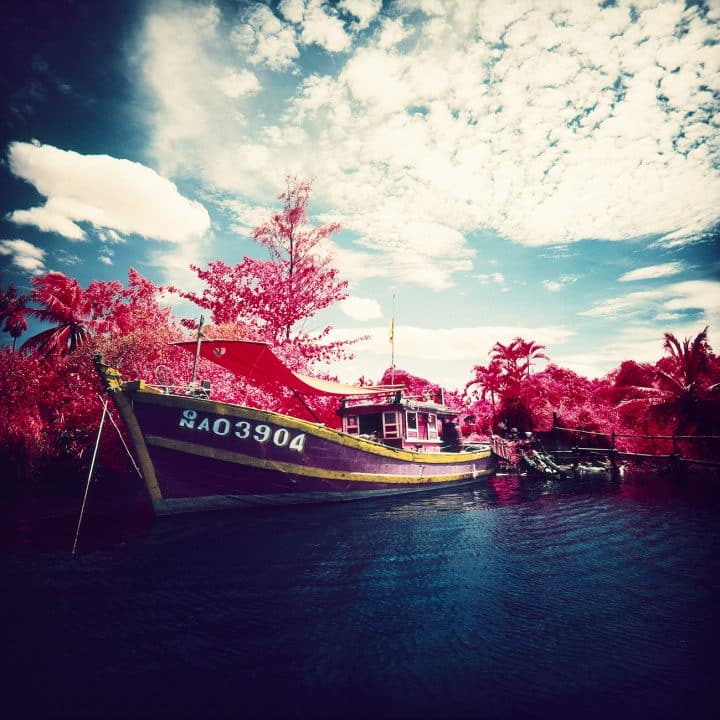
As strange as it may sound, even with Aerochrome the LC-A 120 consistently delivers surprisingly good results. That said, it has several quirks and weaknesses that need to be taken into account. There is no filter mount, the frame counter is prone to skipping frames, and the winding knob has a structural weakness that has caused failures on multiple units. I modified my LC-A 120 to address these issues and kept improving it over the years—but one major limitation remained: exposure control.
While the LC-A 120 has a very capable automatic exposure system, it strongly favors wide apertures whenever possible. There is no way to manually influence either shutter speed or aperture. The Minigon XL 38 mm is a surprisingly good lens, delivering exceptional results considering its design, size, and price. However, the behavior of the exposure automation often prevents the lens from playing to its strengths. An f/4.5 aperture is simply not ideal for landscape work.
Years later, I stumbled across a Lomography development article that suddenly put everything into context.
https://www.lomography.tw/magazine/292558-camera-cafe-lomography-lca-120-part-2-tw
The LC-A 120 was conceived as a genuinely compact, fully automatic 120 camera—the “Compact Automatic” idea translated to medium format. The Minigon XL was specifically engineered to deliver a 38 mm f/4.5 image circle for 6×6 while keeping the lens as small as possible, intentionally accepting compromises such as corner illumination and distortion. In that article, Lomography even compares early Minigon XL prototypes with the Hasselblad SWC lens. Reading this later felt like validation: my fascination with the LOMO 38 mm SWC concept wasn’t just romantic—it was exactly the design problem the LC-A 120 team had tried to solve, simply with very different priorities.
That realization ultimately sparked the desire to build a camera entirely to my own specifications.
2020 — Learning the Basics of Building Cameras
During my research, I came across an online article by D. T. Tang describing the transplantation of the LC-A 120 lens into a different camera body. Since the article was written in Japanese and I couldn’t fully understand how some of the technical challenges were solved, I contacted him directly. He was kind enough to answer several of my questions.
After some more or less successful experimentation with 3D printing and searching for suitable donor cameras in local second-hand shops, I decided to start with something cheap and simple: a Zeiss Ikon Nettar, which I bought for around 10 €.
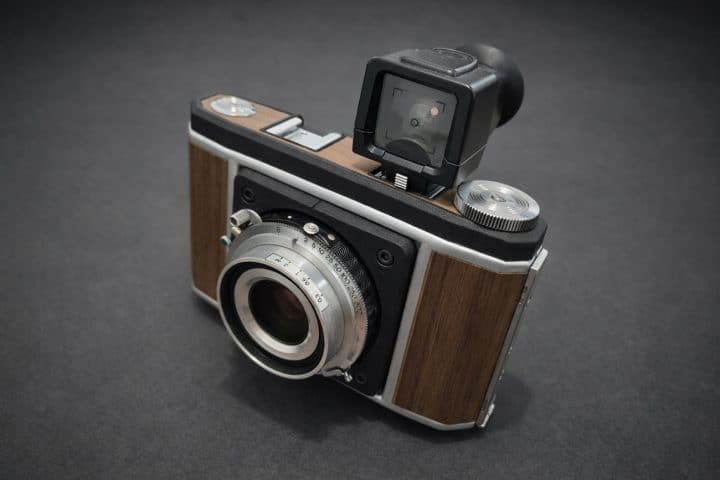
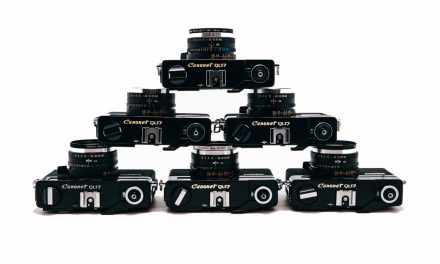
My first camera, V1 – Nettar SWC, was essentially a near 1:1 copy of D. T. Tang’s approach. At the time, I lacked experience, I even chose the same shutter. That build taught me an enormous amount—about mechanical challenges, how to build tools for focus calibration, how to measure f-stops, and how to approach 3D printing in a meaningful way.
At that stage, most parts were still printed in PLA — rough, imperfect, but functional. Only the lens mount was manufactured in metal, reusing the original LC-A focusing helical.
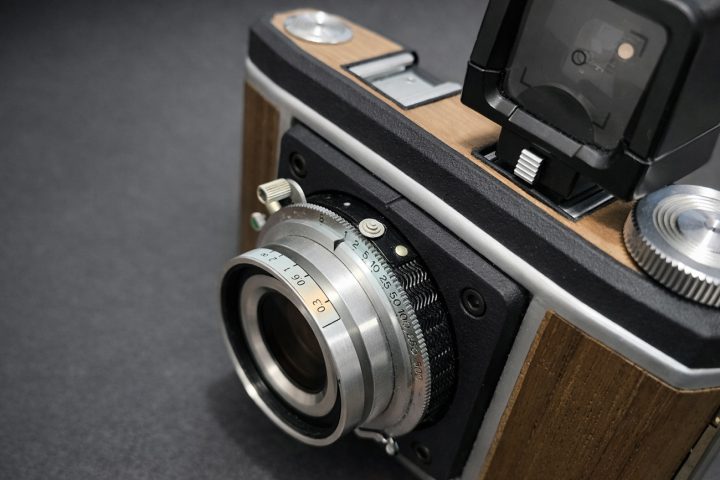
Back then, I was simply thrilled that I had built a camera at all—that it worked, and that it suddenly opened up a whole new world of possibilities: not only taking photographs, but also creating photographic tools. The Nettar SWC remains a build I’m very proud of, because it laid the foundation for where I am now—a creative journey through which I’ve learned a great deal, acquired many new skills, and continually refined my approach to film photography.
2021 — Getting Closer to the Ideal Camera, or Not
V2 – Seagull SWC was the logical next step. I wanted to get closer to my ideal tool: integrating a viewfinder and a light meter powered by a single AAA battery while keeping the overall camera small and portable. I was also interested in the 6×4.5 format and a rewind lever. The donor body became a Seagull 203.
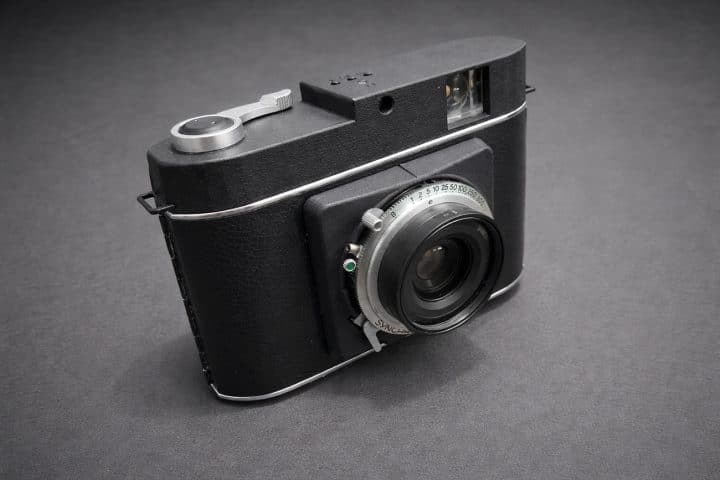
Unfortunately, this build turned out to be deeply flawed from the start. The body itself has several weaknesses, the 6×6 / 6×4.5 switching mechanism is unreliable, and early test rolls showed poor film flatness. I heavily modified the camera through painstaking work and eventually produced many good photographs with it—but I never fully trusted it.
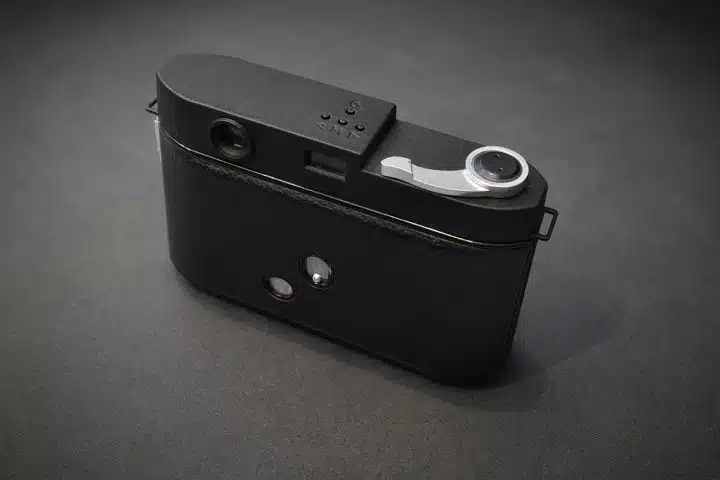
At this point, the focusing mechanism was still identical to V1. However, the final body parts were already printed in MJF nylon to achieve a more professional finish, and I integrated the LC-A strap mounts to make the camera more portable.
The Seagull SWC was the first real step toward a camera that delivered what I had envisioned: exposure control in a compact, understated body—fast in use when needed thanks to the integrated meter, but also capable of slowing the process down. Still, it wasn’t quite there yet. The very short focus throw between 0.6 m and infinity made precise focusing difficult, and I increasingly found myself leaving the lens set to infinity.
This lack of confidence ultimately led to a different approach.
2022 — The First Big Success
For V3, I chose a Mamiya 6 body. This decision completely solved the focusing-helical problem. The Mamiya 6 uses a clever focusing mechanism that moves the film plane rather than the lens itself. This allowed the lens to be housed in a much more compact and robust way, simplified the lens mount, and made focusing far more precise and reliable. I again integrated a light meter powered by an AAA battery.
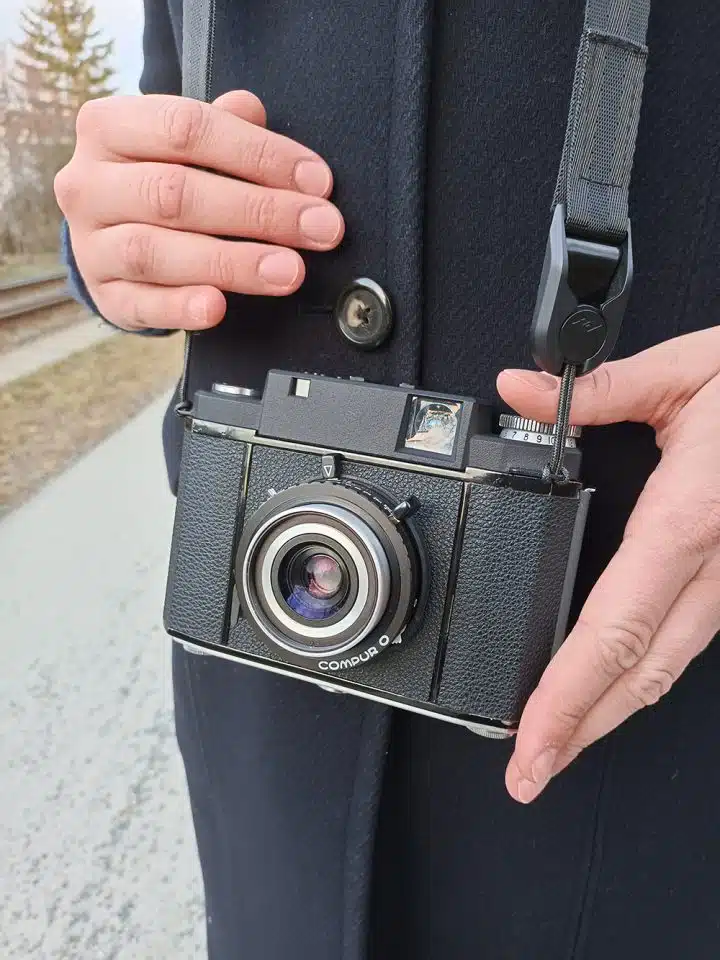
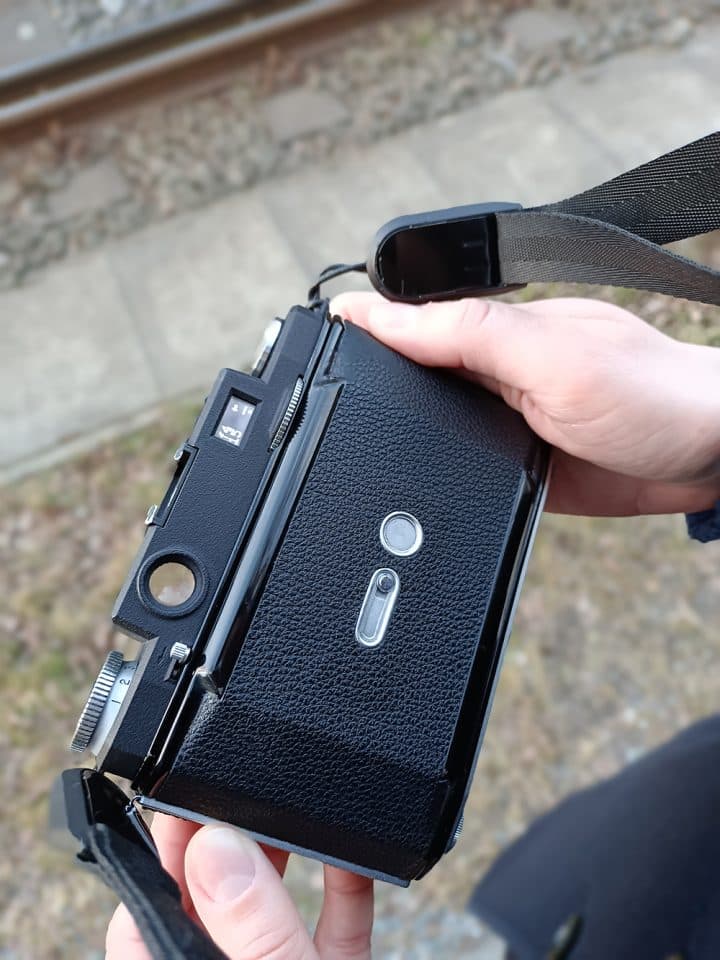
V3b is a lightly revised version built more recently, inspired by the Mamiya SWC, featuring 3D-printed metal parts for the first time and a continuous leatherette covering.
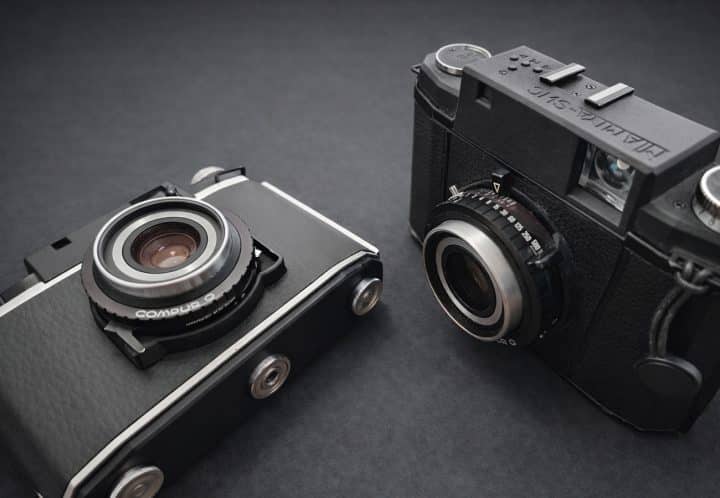
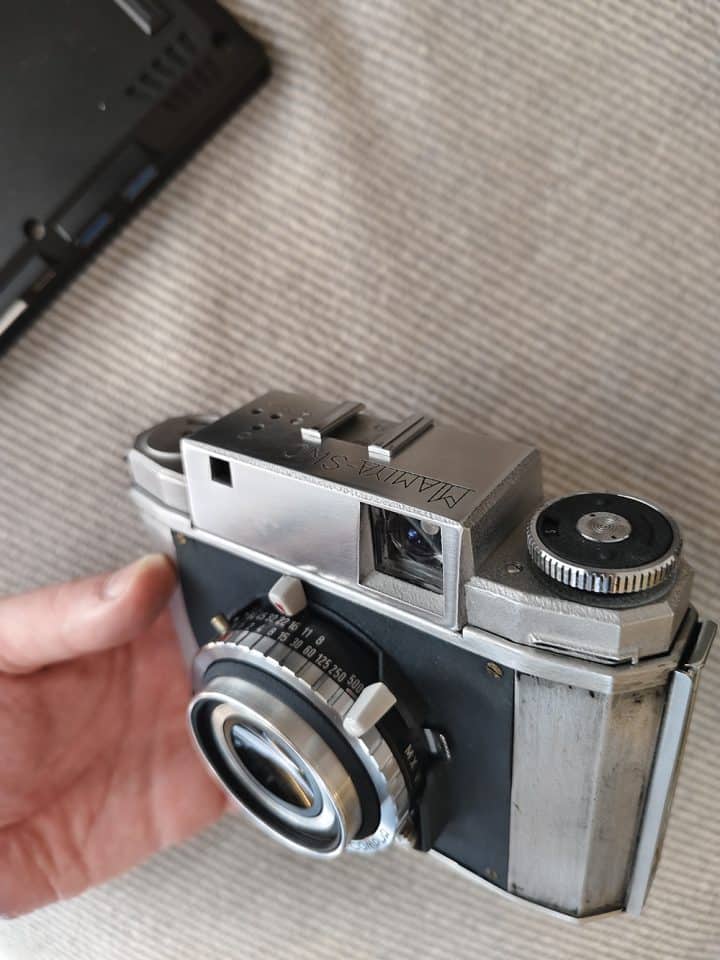
I used my original Mamiya SWC extensively, taking it to Africa, Japan, and Norway without a single issue. It proved to be a trustworthy and very capable camera. However, building cameras had become such a passion that I didn’t want to stop there.
2023 — A Detour: Starting from Zero
By this point, I had accumulated enough experience modifying folding cameras that I decided to design a camera completely from scratch. At that point, I decided to do something reckless: build a 6×17 panoramic camera from scratch. Featuring an uncoupled rangefinder, a light meter, a geared rewind lever, and a focusing helical.
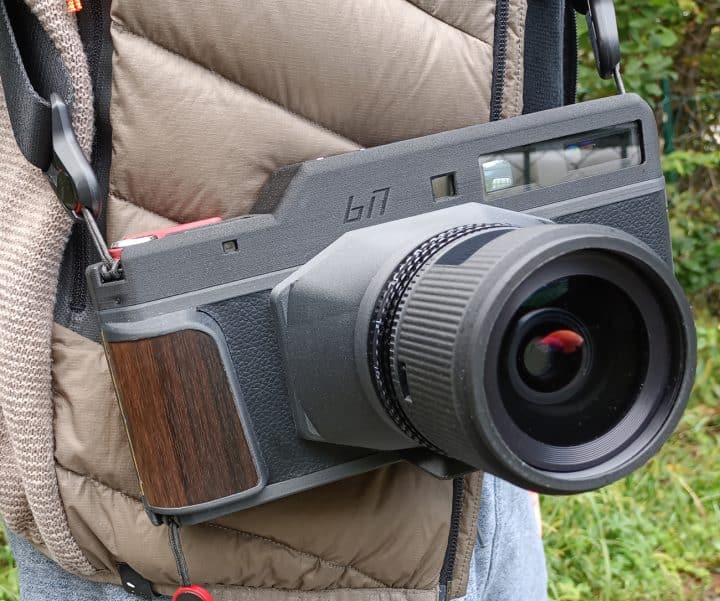
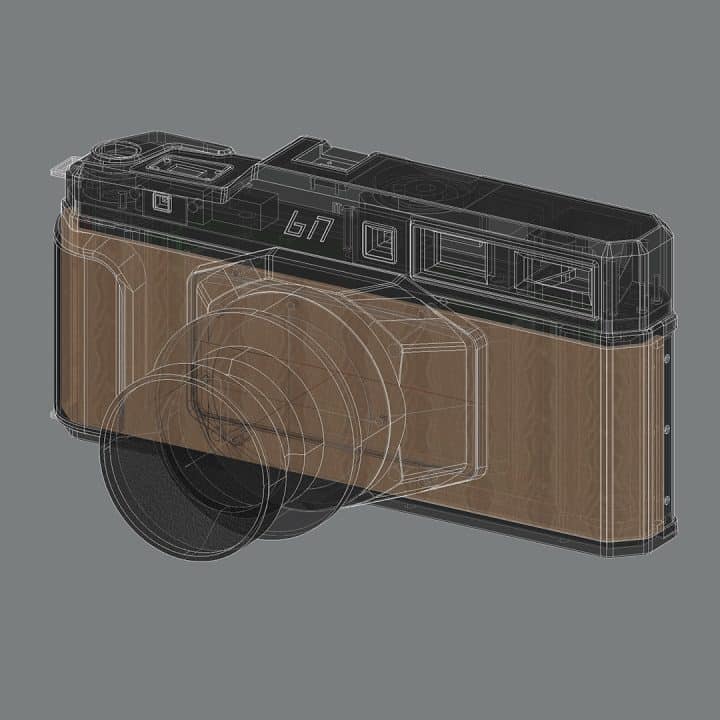
This build took months. I had to solve countless problems I hadn’t anticipated—ranging from simple things like hinges and locks to more fundamental challenges such as designing a pressure plate and ensuring film flatness.
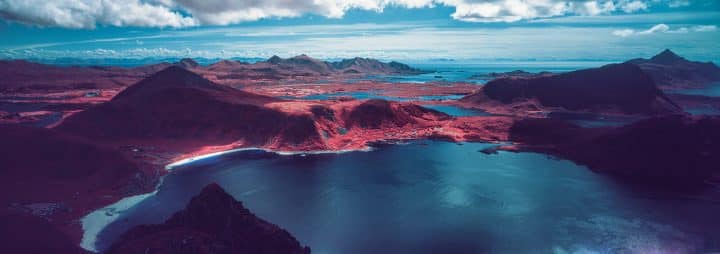
I took it with me to the Lofoten Islands and it produced some of my favorite images from that trip, but I also realized that I had drifted away from my original goal: the smallest possible wide-angle medium-format camera with the greatest potential.

2025 — A New Lens, A New Challenge
V4 is another Mamiya 6–based build, this time paired with a Schneider Kreuznach Super-Angulon 38 mm f/5.6, along with a laser-based rangefinder and light meter.
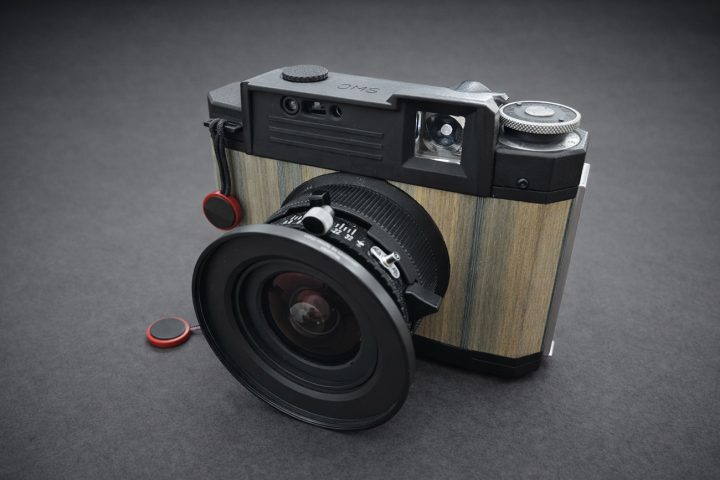
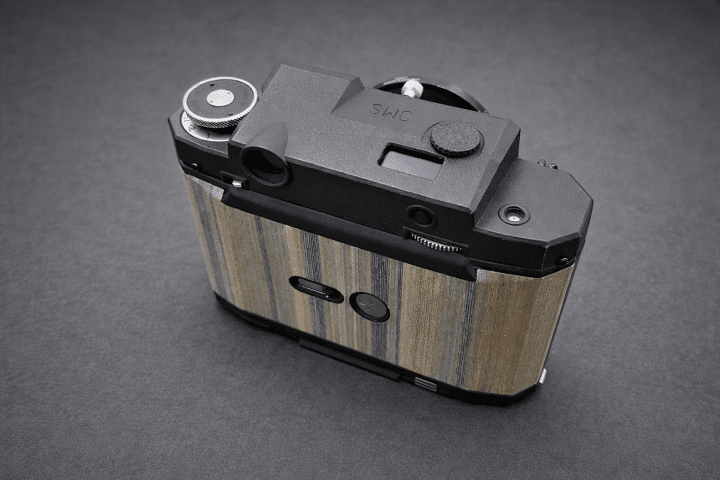
This is one of my most recent builds and is still undergoing calibration and testing. So far, I have to admit that I had expected the Super-Angulon to outperform the Minigon more clearly compared to the Minigon XL. However, since the lens was meant for large format and has a significant coverage, it’s not the best choice for shooting 6×6 at large apertures.
This build again uses only 3D-printed aluminum parts. The laser distance meter is an interesting gimmick, but after using it for a while I have to admit I dislike the visible red laser—it feels intrusive — and I wouldn’t want to point it at people’s faces. For landscape work, I rarely need a distance meter anyway, which makes it somewhat redundant.
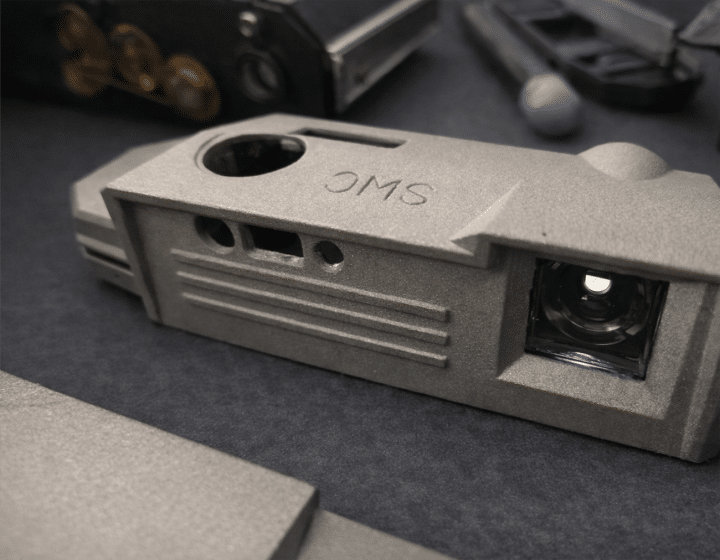
For this build, I have to thank Bellamy, as we sourced the donor body together when my wife and I visited Tokyo on our honeymoon.
2025/26 — Trying Something Completely New
I have seen so many people building and 3D printing cameras over the years and more or less it is always the same thing in a different packaging. A printed body with a lens and little to no electronics. I wanted to tackle this challenge by developing my own PCB and integrating it into the smallest possible wide angle medium format camera.
I started by sourcing a new donor body: a Bencini Koroll II.
I fitted it with a 38 mm f/4.5 LOMO Instant Automat Glass lens, modified for the 6×4.5 format. This camera has no light meter, and the lens is fixed at infinity. This lens is very similar to the LC-A 120 lens but doesn’t have a usable helical and won’t cover 6×6. The Koroll II is a remarkable camera in many ways, it has a unusual 3×4.5 format and a very sturdy full metal body. The top compartment is pretty much empty besides the finder and offers plenty of space for electronics.
Optically, the LOMO lens turned out to be astonishingly good — far better than I had expected. And the body has a very nice heavy feel while being very compact.
That early success convinced me to use the body again for the electronics project. Additionally, after all these years my Aerochrome stock is running low, so switching to the 6×4.5 format also makes practical sense—more images per roll. This time the build uses a LCA-120 lens again as well as a helical mount salvaged from a different camera.

The goal is to integrate a custom-developed rangefinder and light meter, with exposure and distance information projected directly into the viewfinder. This time, I started by developing the rangefinder itself. A new challenge, as I have never before designed a custom PCB. I decided to use a ToF sensor for distance measuring up to 4m, so I wouldn’t have to use a visible laser. A projected target point in the viewfinder helps with aiming the sensor. The original shutter release of the Koroll now serves as a rotary encoder to trigger measurements and navigate through submenus with various functions.
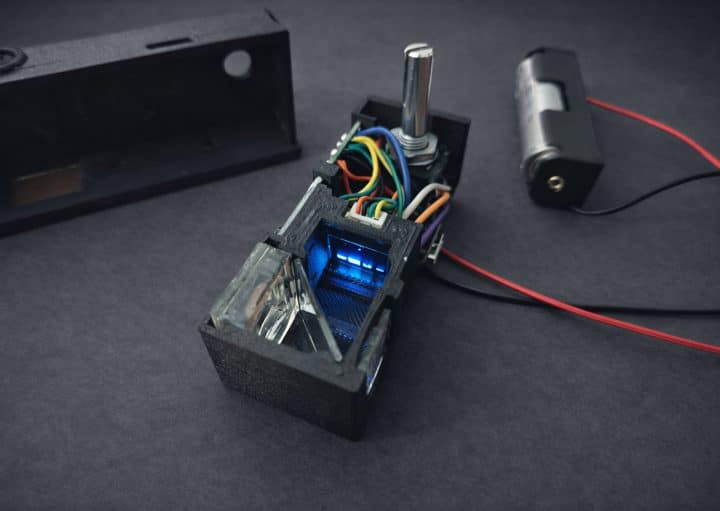
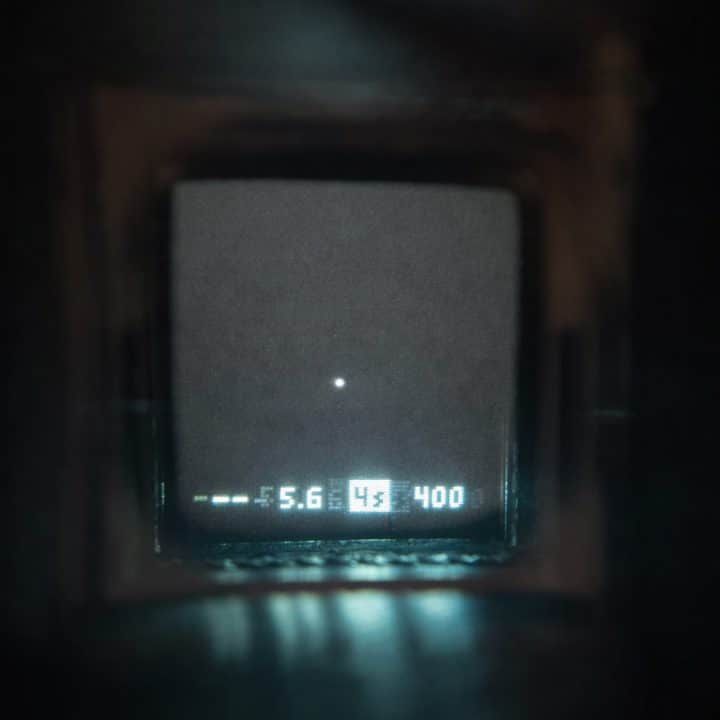
The rangefinder PCBs have already arrived, and the shutter and lens are housed in a printed prototype with working helical, waiting for the final metal parts.
Conclusion
Over the years, photography itself has gradually moved into the background for me, while the passion for developing and building cameras has taken center stage. I still enjoy shooting Aerochrome, but less frequently—mostly on major trips. After all this time, I’ve realized I probably could have owned a Hasselblad SWC years ago.
But the real question is: would I even want one anymore?
In chasing that camera, I ended up building something far more personal.
David @elopan_photography
Thank you to David for sharing this story. The skill that it takes to make something like this is really something to behold. I wish I had that ability.
David, if you ever feel like parting with one of your cameras you know who to call.
JCH